Thursday, July 23, 2009

happy happy!

This post got delayed a little while. I left it as a draft, thinking of completing the post when i get home. But obviously, that didn't happen cos i fell sick that very night. Thank God I managed to recover just in time for a giant order of 210 cupcakes *sweat* I pray that everything will go on smoothly tomorrow =X

So anyway, this is my very very first blog award! haha..I must really really thank honeybeesweets for passing this award to me =)) I'm really flattered and will do my best in keeping up with the blog. Hopefully, my experience in baking will benefit someone out there =)

The Kreativ Blogger Award comes with some rules:

1. You must thank the person who has given you the award.
2. Copy the logo and place it on your blog.
3. Link to the person who has nominated you for the award.
4. Name 7 things about yourself that people might find interesting.
5. Nominate 7 other Kreativ Bloggers.
6. Post links to the 7 blogs you nominate.
7. Leave a comment on which of the blogs to let them know they have been nominated

Right..so..7 things about myself that people might find interesting..I think I'm a pretty boring person to begin with..so that's quite tough, but I'll pull through =p

1. I have 2 younger sisters and 1 younger brother. So that makes 4 of us in total. I guess that's pretty rare since the society is pretty much "nuclear family dominated"

2. Chocolates are my first love. Milk chocolates actually. (not the white ones..the lighter brown ones) However, I've learnt to appreciate dark chocolate every since I went on a baking frenzy =p

3. Local (Singaporean) Hawker Fare is something I can't give up. I have a LONG list of favorites and just to name a few: fried hokkien mee, satay and rojak.

4. I love watching HK dramas, not ALL though. I'm pretty selective too. =p

5. I don't quite like to shop cos I hate to walk.

6. I like to spend relaxing afternoons at a high-tea buffet or a nice cafe with good company and just talk about anything under the sun =)

7. Been a "chaffeur" in my family ever since i got my driving licence. bahh

So, the other 7 bloggers in my list goes as:

  • Simply Anne's - I love her take on food and that one should still enjoy and indulge, with control of course =D
  • Grace - She's like the chiffon master to me. Check out the number of chiffon flavours she's done!
  • Happyhomebaking - I love her earnesty in sharing recipes and the efforts she puts into answering queries =)
  • Pei Lin - Love the recipes she shares =)
  • aimummy - Her perserverance and beautiful works always leave me in awe
  • Baking cottage - Nice nice person who loves to bake too!
  • Elin - Yummy food and lovely pictures!

I hope to do even better after receiving this award and many thanks once again to honeybeesweets =D

Friday, July 10, 2009

Getting to know Bob

I've been waiting to share the biggest ever cake project of my life and here it is, finally. Completed and delivered. I'm praying hard nothing went wrong with the cake and the kids would love it.
It all started out when Ian's mummy very very very kindly referred me to a wonderful nice mother, Judy. Judy was looking for someone who takes cake orders. And like all lovely mothers out there, she wanted a very nice, memorable birthday for her son, Wen Bin. So, plucking up my courage, I took her order. It was indeed a great learning experience for me, and lucky for me, Judy was very clear with what she wanted the cake to be and all the specifics she provided helped me along with decorating the cake easily.
More imporatantly, I'm super grateful to her for trusting me with this huge order. It was fun, tiring and frustrating as well, hand moulding these figurines. And fo course, many people helped along the way. Like D, who helped along with the moulding (he moulded 95% of the red one - "muck") and of course my brother, who, by the way is in the mids of his 'O' levels prelims =X (I'm sorry mum!) He was earnest in giving his opinions and helped me along with touching up the tiny details. Thanks bro!
-muck-
I'm sorry to everyone whom, if i had lost my temper along the way with preparations of this cake. As mentioned of course, it's my maiden attempt at moulding with fondant so i had to have practices and practices and MORE practices. even with that, accidents still do happen when you're into the real deal. Something I learnt about moulding. "you can mould the same thing 1001 times over and probably come out with slightly different variations of it every single time." That's how unpredictable it is. (or maybe it's just that i'm a novice and, *ah hem* not very doing very well in it)

-bob-

-scoop-


for deco

Last but not least, I really want to thank God for giving such an opportunity and gift. Once again, I experienced how real He is. The story goes...


The fondant figurines were left to dry in an air-conditioned room overnight (I was afraid Bob couldn't stand right up =X) Things dried up a little and boy was I excited. 1st miracle: NO ants. =D


I was super tired last night and fell asleep while saying my prayers before going to bed. Really worried about the cake as well. It's my first time covered such a huge cake. It measured 12" x 9" on a 16" cake board. and Judy requested the board to be covered in fondant as well. *sweat*

Thinking back on my "experiment" attempt to see how things would work out. (i experimented on a 6" x 9" cake) and it was quite a bit of a disaster and i thought the experience would help me a little better when the real thing came. NO. it did not.


Happily, I rolled out the fondant and got worried as it didn't seem like there was enough to cover the cake AND the cake board. starting to panick. time ticked by..the collection was 1.30pm at the Searangoon MRT. by 12.45pm, I was still rolling out the fondant and figuring out should I cover the cake. =XXX No choice, gotta roll it thinner to make it bigger. yikes! would it tear and crack and give way while i "drape" it over the cake? HOW? I was suffering from a mild panick attack. I was taught at Anna's classes to roll up the fondant with the rolling pin and unroll it over the cake. Easy I thought. but no! the fondant was rolled out so BIG, the rolling pin wasn't big/long enough at all! It was thin AND heavy. I was practically screaming "help!" in my head. My brother re-assured me that things can AND would work and I gathered myself, said a small prayer and rolled it. a quick glance at the clock. 1.00pm. Ahhhh~


Somehow, we did it. BUT with a bald patch on one corner of the cake board. how?! ( i managed to mend that at the end =p) So anyway, my mum was using the car, so i had to get my own transport to the MRT. I had a good mind to get a cab to zoom to the MRT. Just then...my friend who was going to go out with my sister soon came (who, btw, DRIVES). I begged for a ride to the MRT and he gladly obliged. Phew! they too helped in the final touches of the cake and with their help I finished the cake. YAY!


A quick check on my HP and i realised Judy's hubby who was supposed to collect the cake said he'd be 15 min late! double YAY! I had time to mend the cake, get changed and compose myself. but, NO! i couldn't find a plastic bag big enough for the cake and no way was I going to let her hubby carry the cake box in his hand.


I offered them a free delivery and hence, managed to get it delivered on time. =) I'm still waiting for her comments and photos. Hopefully everything turned out great. The weather's been humid and I'm sure the fondant is sweating =X I just hope nothing on the cake falls off or something. *cross fingers*


-the finished piece-


I'm sorry that you had to bear with me for the long-winded story and thanks for reading it. (well, that is if you DID read it) haha~ I really hope Wen Bin loves the cake. I'm pretty satisfied with it, despite the nerve-wrecking hiccups along the way.


HAPPY 2ND BIRTHDAY WEN BIN!
I've managed to get her permission to share the photos taken during the birthday celebration.

update: mummy Judy was really really nice and sincere in giving her honest opinions on the cake.

"Few pics to share taken in my boy's childcare with his friends. They loved the Bob cake. Personally, i find the cake too soft but i like the taste though. Not too sweet, just nice. My hubby find it nice too compare to some other chocolate cakes we ate, either too sweet or bitter. Loved the taste of sugar moulded fondant too. Not too sweet either. As for the outlook of cake, vehicles are nice moulded. I like the muck. Scoop looked exactly the same too. But find that all the figurines looked wet though, texture abit different and some of them fall off easily but we used water to stick it back. I saw the teachers had 2nd servings, guess they liked the cake too. "
-Judy-

Got to admit that the figurines weren't given enough time to dry out completely, which explains the "dropping off" and "looking wet" part. =X Will do much better in future! =p

Monday, July 6, 2009

Cookies Galore!

I'll have to admit that this blog post title is a little mis-leading. There's only one kind of cookie flavour featured here. BUTTER COOKIES. Its funny how we're usually more pre-occupied with the "pro" stuff that we come to realised we don't even have a good, basic recipe.

Fortunately for the invention of the World Wide Web, I don't have to rack my brains and squint my eyes all the way through shelves and shelves of books in the library for tried and tested good recipes. I fell back on the ever reliable HHB for the recipe of yummy, easy butter cookies.

The recipe was a breeze and the recommended way of rolling and cutting it out was brilliant. i loved it. It was time for the taste test. And.. it passed with flying colours under the examination of my younger sister and her friends' taste-buds. Not to forget, my brother as well. I actually did the first batch earlier, but without any high expectations. (as i had terrible experiences with cut-out cookies previously) Hence, no pictures of the first batch.

Not to mention, what's the fun in butter cookies when you don't decorate them! Many people start of baking with the simple stuff like cookies and decorating cookies. Ashamed of myself, I've never ever decorated a cookie before! So, whipping out my meringue powder, i made some royal icing. Thanks to the great tutorial here, I managed to grope my way around decorating cookies a little better. Here's just part I. The outline. I'm praying hard that the flooding succeeds and hopefully you'd get to see the end-result soon!

*I added cocoa powder to the royal icing to get a dark shade for the outline instead of trying to get it tinted black. (it's an experiment anyway =p)

Up next! Stained glass cookies. Do a quick search and I'm sure you'd find many people having attempted stained glass cookies. They're such a beauty, but I'm afraid I spoiled them =S The sweets bubbled like crazy in the oven and now they all look bubbly and "hole-ly". I comforted myself and well, isn't that a new cool design? HA~
To save resources, in case this fails, I only experiment on 3 cookies. Yes, 3 only. All the cookies above came from the same batch of dough. I figured that the temperature was too high for the sweets to melt nice and evenly, so I'm gonna try it a a lower temperature in future. Until I succeed...
Here's an attempt to see the "transparency", stained glass effect. Sad to say, I think the bubbles are obstructing that view. sigh. Till then..
Here's the recipe used for the butter cookies, with a tiny admendment and that is, the addition of pure vanilla extract.

Vanilla butter cookies (makes ~20 cut out cookies about 3" in diameter)
Ingredients:
100g butter, softened at room temperature
80g caster sugar
1 tsp pure vanilla extract
1 egg yolk
180g cake flour
20g corn flour
Method:
1.Sift cake flour and corn flour together and set aside. Line baking tray with parchment paper, set aside.
2.With an electric mixer, add in sugar to the butter in 2 ~3 additions and cream till the mixture turns pale and fluffy.
3. Add in egg yolk and vanilla and mix well.
4. Add sifted flour mixture in 2 ~ 3 additions, stir with a spatula to form a soft dough.
5. Place dough in a plastic bag and flatten with rolling pin. Refrigerate the dough for about half an hour.
6. Remove dough from fridge. Roll out dough on slightly floured work surface and cut out with slightly floured cookie cutters. If the dough appears to be a little to hard and breaks into pieces while rolling, leave it at room temperature for a few minutes. The dough will soften up and can be rolled easily.
7. Bake at pre-heated oven at 180 degC for 15 mins.
8. Let cool and store in air-tight container.

*I placed a ball of dough in those big transparent plastic bags (people used to put bao/curry puff/etc) and rolled the dough. This way, the you have a less messy work space and need not flour the work surface or rolling pin.
*I rolled the dough to about 1/4" thick.
*Do flour the cookie cutters lightly as it will help release the cut-out dough easier.
*I split the dough into smaller mounds and rolled it in several plastic bags. That way, the dough won't soften up too much/fast. You can work on each dough slowly without worrying the dough softening and having to refrigerate it again.
*gather the scraps and roll them out again until you finish using the dough.
recipe adapted from HHB

Tuesday, June 30, 2009

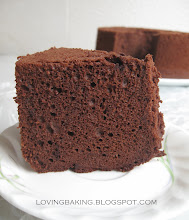
double chocolate chip chiffon cake

Pardon me for the lack of posts recently. I've been baking, still, but not as much, not as often. Somehow getting real lazy after my holiday trip. Plus I've been doing certain experiments along the way, which I figured wouldn't be appropriate to be posted up here online.

I nearly gave up on this post as well when the cake slipped right out of the pan not long after I overturned it. For some reason, I decided to go ahead and take photos after realised how tall the cake had been. I'm pretty sure it slipped out due to underbaking. Plus, it shrank a little on the sides. A quick check on Rei's Chiffon "handbook" left me concluding that the egg whites were probably a little over-beaten.

Furthermore, I probably did not do a good job mixing and all the chocolate chips ended up at the bottom (now, after overturning, becomes the top)

Nonetheless, the texture was great except for the not so nice appearance. Itching to try out this recipe? follow me here!

Friday, June 5, 2009

another try

another try at the recipe I've posted previously. This time, I decided to bake it in a smaller pan and following the original recipe to the T. that is, a pure, simple, butter cake.

The original recipe called for baking in an 8" cake pan. I thought to myself, since it would be some sort of an experiment/try-out, I decided to half the recipe and bake it in a 6" cake pan. This way, less ingredients used, less damage to my wallet + waistline. Sounds pretty good huh?

This time, I managed to whip the egg whites to soft peaks stage (or so i THINK it is the correct soft peak stage). My oven played tricks on me and the temperature was really not what it was supposed to be. As a result, the cake split open at the top while the interior was still underbaked. =X

It really turned out to be an experiment of some sort as I had no idea how long should I have baked it for. I'm still in the midst of figuring out my oven's temperment (big sigh) and wondering if my oven thermometer is calling for a retirement soon. (I dropped it once, and i'm not unsure if it functions as well as before)

Whatever factor it was, the cake turned out pleasing, soft and fluffy, moist and buttery. I felt, however, that there was a tinge of sugar overdose in there. *shrugs*

p.s: comparing to the butter cake I had at some hotel, i can safely say, I like mine alot better. I think D has to agree on this..right? haha!

Yummy Butter Cake

Ingredients:
125 gm. Butter
50 gm. Sugar
1/2 tsp. Vanilla Essence
45 gm. Egg Yolk
1-1/2 Tbsp. Evaporated milk
100 gm. Cake flour
2.5 gm. Baking powder (about 1/2 tsp)
a pinch of salt
80 gm. Egg White
50 gm. Sugar

Method:
(1) Grease a 6” cake tin. Preheat oven to 180C. Beat butter, margarine, sugar, salt and vanilla essence until light and creamy.
(2) Add in the egg yolk one at a time and beat until creamy. Add in evaporated milk.
(3) Fold in sieved cake flour and baking powder.
(4) Whisk egg white and sugar to soft peaks and fold gently into the creamed butter mixture. You can fold in 1/3 of the egg whites first to lighten the creamed butter mixture followed by the rest of the egg whites.
(5) Bake cake for 1 hour in oven at 180 deg.C or when the skewer comes clean. Turn the cake onto wire rack to cool.

adapted from aunty yochana

Some tips..
1. Do not over/under cream butter sugar mixture. Over creaming results in a cake with a sunken center. Under creaming results in a dense, heavy cake
2. Do not over/under bake. Over baking results in a badly cracked, dry cake or cake that shrinks upon cooling resulting in a cake with less volume. Under baking results in a heavy, wet cake.
3. Turn over the cake immediately after removing from the oven to prevent it from sinking and shrinking from the sides.

Tuesday, June 2, 2009

crazy me

What set out to be an attempt of nice little chicken pies turned out wayy wayy different.

My sister was asked to bring food along for a "picnic" cum birthday celebration of our new friends, a cute German/Hungarian couple who are here in Singapore for 2 weeks to spend their Honeymoon. Sweet huh..

The initial plan was to bake some yoghurt cupcakes (Anna's recipe), which was super fast and simple, but most importantly, super yummy. Somehow, things got evolved to making normal egg tarts with shortcrust pastry. However, I decided that I would probably try my hand at chicken pie and test out a puff pastry recipe which i once made like eons ago. Coming to the puff pastry recipe, I attempted it probably like almost 2 or 3 years ago, using pastry magarine at that time. The pastry rose so beautifully in the oven, it could easily pass off as pastries sold by Polar puffs and cake. Serious. This time, I decided to be more adventurous and use butter instead. Bad Choice. Wrong Move.

As you know, the weather here in Singapore has been pretty quirky and annoying lately. It's be sooo hot and warm, you probably can't survive without the invention of the air-conditioner. So, trying to be smart, I made sure the butter was rock hard, super cold. I thought to myself, that'd probably do the trick and avoid running into gooey, oily, melting butter when I roll out the dough. Wrong. The butter was so hard, I could not roll it! So, I tried to incoporate it by using my rolling pin and banging it into the dough. The nice "envelope" package I made gave way as the edges of the hard butter poked through the dough as if it was eager to return to the hot humid weather outside. I scrambled to patch up the holes and made do with whatever I could. Onwards, things went alright, but not the best i expected. (this was becuase I rolled the dough as lightly and gently as I could. ) Come the time I needed to roll it out thinly to cut out the shapes, I knew I couldn't run away anymore. As expected, the dough busted at the corners and edges and slabs of butter oozed out. Heck! I had to make do with what I had.

Bearing in mind that you gotta let the dough rest in between turns, my conversation with my sister spiralled and i ended up making portuguese egg tarts. From cupcakes, to normal shortcrust egg tarts, to chicken pie and alas! portuguese egg tarts. What a pair of indecisive sisters. Zzz

My previous attempt at portuguese egg tarts turned out horrid! Goodness knows why I picked that recipe (probably becuase of the picture). It involved grated cheese! yes! grated cheese in the egg custard filling. Yuck! it taste nothing, i emphasize nothing like a normal egg tart, much less being able to pass off as a portuguese egg tart. Feeling defeated and lousy after that attempt, I don't know where I got that courage to decide on a portuguese egg tart filling in 15 mins. Yes, you guessed it, I was browsing thru the web for recipes while waiting for the dough to rest in between turns.

Now back to the puff pastry dough, it was soft, oily and buttery. BUT, as i cut through the dough i could still see some layers and prayed hard they'd work. A few tests, and it came out o...k.. Not like perfect, nice puffs, but it did puff up and taste good. Just that, they looked horrid. So now, came the real test. Combination of my last minute found portuguese egg custard filling recipe + not so successful puff pastry. And...

It huffed and puffed in the oven with the VERY uneven, ugly, cut-out pastry sides with the super pale egg custard filling :S which almost looks white. In the end....

This was what I ended up with. I must say I was really pleased! (except for the appearance)
Signature brown spots (checked!)
Crispy puff pastry (checked!)
The only thing left, was the taste test. I'm suffering from huge ulcers, so I had to get my sister to test it. It passed the test! The pastry was fragrant, crispy (ok maybe a little too crispy) and flaky. The custard was cooked just right and tasted like portuguese egg tarts (quoting my sister)
And so, I rushed to prepare more egg custard filling. (remember that was a trial?) Lo and behold, my sister told me there might be more people and asked if i prepared enough tarts. YIKES! what now?! So I told her, i'll try preparing MORE tarts, but the normal shortcrust ones. It was IMPOSSIBLE to do another puff pastry. Too bad, I was too slow and inefficient, I had to make do with whatever amount of tarts I had.

Feeling annoyed, I decided to make more egg tarts! pandan ones to be exact. I made these tarts before, during my exams and didn't have time to snap picture and blog about them. Those tarts looked better, there were a much brighter green and looked darker. I was really not pleased at all with how the colours turned out this time but oh well! no one to blame except me! I added too much water to blend with the pandan leaves as a result, the colours were far lighter than it should have been. Not to despair, these tarts were super fragrant, bursting with pandan flavour =)
In fact, while taking the pictures, I kind of liked how the pastel effect of the green turned out. Feels like a perfect little afternoon tea treat. With nice cold tea. hot tea doesn't go lah..the weather so hot. bahhh..
This pandan egg tart recipe is taken from aunty yochana. The previous time, I attempted it with the crust recipe here. This time, I decided to use the crust recipe here instead. It turned out that the first was a little more fragrant and buttery and softer. The second one was a little hard, but still nice and edible. =)
*Update (03/06/09): Tried out the crust recipe from the pandan egg tart recipe here again yesterday and can safely say, this crust recipe is a definite keeper! Just remember not to make the crust too thin, or your tart might crumble before it reaches your mouth. Tried out this crust recipe with another egg custard recipe which is yummy, easy and super smooth. Will post the recipe when I've perfected the sugar content and bake timings.

Despite the tarts being a little hard (which I suspect might have been overbaked), the egg custard was still fragrant nice and smooth. =) I still need to improve on my moulding skills. But, I blame it on me being tired after standing in the kitchen for almost the whole day. heh..

I love this picture! Doesn't it just reflect a super relaxed, nice afternoon tea treat? hahaha! Me and my tai-tai dreams again =ppp
Do try out these tarts if you can afford the time! They're relatively easy to put together, just a little effort in moulding the dough into the tart. These are definitely something you can make to impress! Special home-made, unique-flavoured, pandan egg tarts. =D
Related Posts with Thumbnails