Sunday, September 27, 2009

a new job, new plans and a break

Nope. No pictures today.

Haven't been really updating this blog as frequently as I would like to, but I've been pretty busy with the mooncake orders. Orders are now officially closed and big thanks to everyone who ordered from me.

While the blog entries have stopped for a while, things have in fact been busy busy and pretty "hectic". Though busy and tired, I really find joy in doing what I do. I am also really glad that my passion in baking is taking me to a whole new level. Though exciting, and being something I could never dream of, it encompasses a whole new dimension in my perception of baking. I am taking on a new role, with new responsibilities and with a different approach. Sounds like a riddle? All will be revealed in due course =p So stay tuned...

Another thing worth mentioning is that, yes! I finally got a job. After months of procrastination, thinking and baking, I finally found myself a job. Things would get busy and I am expecting to bake lesser and lesser. Well, at the same time, I have been toying with the idea of going on a hiatus. The job came at a right time, giving me more reason to take a break from blogging. But but! I will be back! Soon, I hope =p

With a job and more new responsibilities, I thought I'd take a break from blogging to sort things out. Certain things that have happened made me a little weary of others and disappointed too. Seeing blatant "plagarism" of people's photos and recipes made me wonder whatever happened to "integrity".

okay okay, before I get all too philosophical and trying to act cheem, I just want to thank everyone who has been reading my blog, whoever you are, whether or not you are existing. I hope my blog has been of some help to you or anyone and it's my regret for not being able to post up more recipes. I'd work at that in time to come when I have settled down more, and get used to being busy with work.

Thank you for all your order enquiries, I will still be taking orders but my schedule will be more tight and less flexible. So if you are keen or interested, do e-mail and let me know early. I will try my best to meet them =)

Thanks! and see you soon!

Thursday, September 24, 2009

Any last orders?

I want to extend a huge thank you those who have ordered mooncakes from me this year.

For those who have not placed your orders, hurry now and do so at SweetCouture.
We have added many more flavours to our existing range. Download the order form today!

Due to overwhelming responses, we are closing our orders soon. So, hurry, place your orders by 27th September.

Once again, a BIG thank you!

Wednesday, September 16, 2009

Durian Chiffon


I would be helping out at Sugar Inc.'s "The Art of Chiffon" Workshop this Friday. To help me get prepared, Anna sent me a copy of the recipes to get myself familiar with the recipe. If you have been following her website/blog, you'd know that she has included a durian chiffon recipe as a bonus recipe for participants to try it out at home.
Okay, okay, before I digress, I actually bought a tub of durian puree to continue more mooncake experiments and increase the variety of flavours and also because Ian's mummy has been asking about durian mooncakes =p. So, with the tub of durian puree and a durian chiffon recipe, I couldn't help myself but tried out the recipe.
Although you seldom see chiffon posts in my blog, but truth to be told, I've been trying it out again and again for quite sometime. Somehow, they just don't get photographed before it's cut up into pieces and disappeared into someone's digestive system. I've only used Rei's chiffon recipes and nothing else. I do remember having attempted a durian chiffon recipe sometime back, but that was baked in a round pan. It actually kinda failed then and ever since, I was a little petrified with baking durian chiffon. (the last attempt turned out like kueh )
However, I really trust Anna's recipes and they've never fail. Not only so, people are usually full of praises when I make cakes using her recipe. So, without thinking, I measured the puree, strained it till it was really smooth, creamy and nice. Thank God I get to skip the step of removing the flesh ha~ The egg yolk batter was done in a jiffy and the egg whites whipped so beautifully. But boy! The batter was ALOT and my arm ached halfway through while folding in the whites.Phew! I persevered and sent it into the oven for baking. It rose really really nicely and high. I tent the cake right from the start as I know my oven always browns the tops too quickly. I usually remove the baking tray (which I use to tent the cake) ~10 min before the end of the baking time. The cake rose so high, it took with it a patch of brown skin. (see above picture) Or maybe because it liked the smell of durian too? bahhh~


The time came for me to unmould the cake and, yes, I was rough. Very rough indeed. The browned sides were lovingly stuck onto the chiffon tin and my jerky hand movements made holes and tore some edges off the chiffon. The cake was SO soft, I really had to handle it with care. It was really moist that I could hear the squish-y sound as I sliced into the cake.
To be honest, I'm not a durian lover. I don't eat the fruit, but i do eat anything related. Durian ice cream, durian cream puff, ...I took a bite off a slice and fell in love with it immediately. The durian fragrance was subtle yet substantial, present, yet not overpowering. I asked my sister to have a bite to try. (she's a durian fan by the way, she wanted to scoop the durian puree out of the tub to eat -_-''') I asked if the durian was too mild for her, she said no and few seconds later, she asked for the whole slice. And told me she likes the cake =D 
Mild enough for non-durian lovers, fragrant enough for durian monsters lovers! 
Although I really hope to be able to post this recipe, I'm afraid I won't be able to. But! You can always sign up for "The Art of Chiffon" class right here! A variety of chiffon recipes will be covered and learn the essentials to making a good, yummy, fluffy chiffon!

Monday, September 14, 2009

Mooncakes Part III

Here's part III of this year's mooncake series. If you're wondering where did part II disappear to? or if I've made a mistake, it's actually here. I kind of forgot to name it proper (as I was obsessed with the "MORE" theme =S) but I suppose that constitutes as a part II too right?
So, I've finally finally started on the snow skin selections and ta-da here they are! All the mooncakes in this post were made in a day. yes, 3 flavours and 2 kinds. It was pretty tiring but satisfying too! I had fun playing around with the different mooncake plates and changing the designs. The headache comes when you've got too many flavours and you gotta start identifying them amongst the sea of mooncakes.
But but, snowskin ones aren't much of an issue. The colour tells it all isn't it? I love the deep hue of green on the pandan snow skin. Believe it or not, the gree came entirely from freshly blended pandan leaves. Nope extract, essence nor colouring added! Completely Au Naturel! (I think my spelling's wrong, but you get the picture) The mango snow skin was a little disappointing though, the nice golden yellow I was expecting didn't turn up! Though there was a slight subtle mango fragrance penetrating the skin thanks to the mango juice I used. =D The Mango Lotus was perfect this time after the horrible perfumy experience the last time round. yay!
The texture of the snowskin is great! But it was a little difficult to work with. I suspect it's due to the higher content of liquid. Anyhow, I'd just have to practice wrapping them nicely and make it look real pretty =)
Now this may look or sound odd to some (including myself). I embarked on this combination of flavour and "type of skin" as:
1. I wanted to see if I could wrap a salted egg nicely.
2. Know how to make mooncakes with salted yolks
I told D my plan and he kept quiet for a moment. We continued and finally he popped the question. "Are you sure you wanna put the yolk in a snow skin mooncake? I like mooncakes with salted yolks, but not when it's with snow skin!" I thought for a few seconds, and replied, "But I saw people doing that!!" I ran through the imaginary memory store in my brain (which doesn't function too well) and alas! I  found  remembered where I once saw it. It was from a mooncake recipe book, I quickly whipped it up and show it to D and went "There! They make salted yolks with snow skin leh". D had no choice but to accept the fact that this experiment was to be carried on. muahaha!
So since the yolks were to be placed in snow skin ones, it had to be thoroughly cooked before wrapping and thank God it was cooked and tasted nice. (I don't eat salted yolks, but a friend's mum loved it =D)
Note: These were mini mooncakes (~60g) and so the yolk was HUGE. My mum feels the yolks are too big and too over-powering. but hey! Everyone has different preferences right? I'd still be using full yolks for mini mooncakes. I though of making them half the size, but that wouldn't give you the nice round shape and beatiful innards anymore.
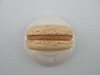
Enough of snow skin and crazy try-outs, let's go back to tradition. I was really excited to use this particular plate design you see here and it obviously proves useful in identifying mooncake flavours. Especially the baked ones because they all have the same skin! So quite obviously, this particular moonie had a Lotus filling. The only boo-boo is that I wished I had the "白连" plate design instead. I love lian rong, but prefer bai lian much more anytime! I learnt from the auntie at Sun Lik that the difference is actually just the lotus seed skin. White Lotus paste is cooked with the skin removed. Normal Lotus Paste is cooked with the skin intact
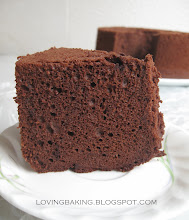
Here's the cross-section of the white lotus paste ones =) The skin, a tad to thick but I'm not sure if I should reduce it. Any suggestions? Would you eat a mooncake with skin this thick or a mooncake with slightly thinner skin? Leave a comment and let me know! =D
The challenge! Wrapping salted egg yolk in baked mooncake. This time, I cooked the yolks partially before wrapping them in. I've read that some cook them partially and some leave them raw. I felt uneasy about having them completely raw though I know they'd obviously be cooked in some way or another whilst basking baking in the oven. It seems like it looks a little over-cooked and appears a little dry. But D re-assured me that this is normal! How? Please advice a non-salted yolk eater. bahhhh
Just bear with me for the last one. Baked Pandan Lotus. I love pandan. Anything pandan. Pandan chiffon, barely cooked with pandan, pandan jelly, ...The smell of pandan Ahhh! its just so intoxicating. Don't you agree? Anyway, this pandan lotus paste is pretty good. =) Not too sweet and a nice real pandan fragrance. YUM!
So that's the end of Part III of this mooncake series, next up..probably...durian??

*I've received requests for mooncake order and I am very glad to say these will all be available for orders! Just visit sweetscouture.blogspot.com for more info on how to order. =)

*the above mooncakes are ~60g. Some are a little larger. I would only be making standard sized mooncakes upon special request. Book your order soon!  These are entirely home-made, so please understand there's a certain amount that I can make in a day. =)

Saturday, September 12, 2009

cupcake order!

Got this pretty last-minute order and was really glad I was able to pull it off. I'm thankful for people I've "known" through flickr and that I'd been able to draw many many many inspirations from their works.
The lady who ordered from me asked for a simple birthday cupcakes for her best friends =) So sweet! She added she quite like ribbons and piggies too. Immediately, ccyhan's piggies cupcake photos popped into mind and I showed her the link of those cuppies. She liked them and so, I replicated them. Though probably not as nice and pretty as ccyhan's, but I thought it was passable =p
Thank God my younger sister was home and she was helping me with some of the moulding and cutting out fondant flowers happily haha!
Pretty obviously, these cupcakes were "From Leander". Really want to thank Anna for loaning me those cookie letter press and I put them to good use on these fondant! yay!!
Leander orded 12 cupcakes and so with the Blogshop Promotion, she got 3 flavours! Yummy Oreo, Nutty Nutella and Zesty Orange =) The Yummy Oreo and Nutty Nutella were frosted with Swiss Meringue Latte Buttercream while the Zesty Orange ones went with cream cheese frosting. yum!
I had some extra cupcakes from baking and well, my brother is having is CCA's sec 4 farewell party tomorrow and he had trouble thinking of what to give his juniors. haha! So, these extra cupcakes came in handy and i just frosted them all with sinful, rich chocolate ganache =DD [p.s: I got them from the pretty floral cupcake class (as there were extras hehe!)]
A close-up on the piggies! I made 4 of them each with their own "activity" and "character". I quite like how things turned out =p
Leander requested last minute for one cupcake to be decorated with another friend's name "Don" as he was also celebrated his birthday. She mentioned that she wasn't sure if he'd turn up and if one of it was with his name she could pass it to him the next day. So, to accomodate for the uncertainty, I made one cupcake with "happy bday don" so it'd seem "whole" to be given individually =) I made a rabbit to go along as Leander said that he's born in the year of rabbit! A pity that the rabbit couldn't really be seen =(
I had fun overall and was really really glad to pull off yet another order. phew! The night was spent viewing the Dead Sea Scrolls at the art house. hehe..pretty interesting facts and amazing truths =D

Friday, September 11, 2009

MORE mooncakes!!

This is a delayed post as well =XX I actually got these baked last Friday. And as usual, I was lazy, tired and had a thousand and one excuse before I got these photographed, edited and posted!
My younger sister asked if I could make mooncakes with her as a birthday gift for her friend. I thought, what better excuse for me not to make it with her? =p So, with the new mango lotus paste and pomelo lotus paste we tried three different kinds of "flavours". Some were mango lotus, others were pomelo lotus and the rest mango and pomelo lotus mixed together. Sounds pretty interesting and yummy right? NO! To my dismay, the moonies turned out a little odd? With the pomelo tasting like....perfume? It was good if you nibble it and eat it bit by bit but not when you chunk it down your throat like no one's business.
Anyhow, we concluded that these would probably taste ALOT better with the snowskin ones, so experimenting that now fills up my free Saturday. (you'd know what I'm saying if you had followed my previous post)
These were the mango-pomelo ones. The paste looked so similar, you can't see the distinction between them after baking =( Worse still, they taste hmmm really special. =p
BUT but but, I had tried a slightly different ratio on the skin and adjusted the baking temperature and timings and yipee! They were thin and soft now, right after baking! No more hard, rock-like biscuits! I can safely conclude that I have highly over-baked them the previous time round.
But, no fret! From this mini mistake/experiment, I can conclude, mooncakes are resiliant to overbaking! muahah..but of course not when they're over baked to the point of being burnt and black. I don't think anyone would still want to eat that. haha!
So, my advice is (an advice from a mooncake novice..how odd) if you overbake them (i.e. hard like a rock and taste more like crunchy biscuits rather than mooncakes) just leave them in a airtight container for 2-3 days and ta-da! Nice yummy, soft  mooncakes. If you don't, good for you, just pop them right into your mouths =p
Due to poor calculation, I had leftover mooncak pastry and I took the chance to make some small little piggies a.k.a 猪仔饼. They obviously turned out a little wrong ha~ My dad thought they were mouse -_-''' and D thought they look more like crocodiles rather than pigs. sighh.. Despite they're dubious appearance, they taste pretty good =) Just like good'ol piggy biscuit =D

graduation piece

I'm a little late in this post (What's new), I've actually completed this last Saturday and the pictures were sitting in my camera until I decided to take them out late last night. =p
I don't recall having mention this before, but yea, I've been attending Cake Decorating Classes at BITC (Baking Industry Training Centre) for the past 8 weeks.
As a course requirement, everyone was supposed to make a "Sugar Plaque" (Not sure if I got the spelling right) at the end of the lesson as a piece of assignment. In case you were wondering, the plaques were made of sugar paste which were left to harden and dry up. On the other hand, the pictures/flowers were made up of a combination of royal icing and fondant.
Each student had to complete two plaques and we sorta agreed that one would be a floral one and the other would be something with a picture or some sort.

Here's a collage of the sugar plaques my other classmate completed! Aren't they pretty? Although made up of entirely edible ingredients, I don't think anyone actually eats them. They become more like pieces of art. Frame them up and I think they'd make a good decorating ornament haha! Or better still, some speacial design to go along with your pretty cake. Perhaps, a wedding cake =p
After 8 weeks of burnt Saturdays, I suddenly feel a little lost having my Saturday free, but I'm not complaning! More time to try new recipes and more time for rest!

Wednesday, September 9, 2009

Blogshop...opened!

This may come as a surprise to some of you as it was for myself! I've finally decided to officially open a "blogshop" to take in orders officially after various e-mail enquiries.

I hope to be better organised and systematic as well as work to cater a larger crowd. So, having said that, I didn't realise what a special day it is today. 090909. With that said and with the official opening of my blogshop, I've decided to hold a mini promotion valid for a limited time!

Hop on over to check it out!

Friday, September 4, 2009

MORE macarons...

I love love love this picture! =DD BUT, i'm not the photographer. Remember my last macaron post, when I'm supposed to pass them to a friend? Well, those pink sweet things never quite got to where it was supposed to, so I made another batch, experimenting at the same time, since we had a dinner gathering last night! (phew! what a long sentence)

I started the day feeling a little lazy and eventually still got around making these little things. I didn't know where I got the courage from to venture into trying some new flavours other than my usual plain shells + chocolate ganache. So, I tried making some coffee flavoured shells by just adding 2g of instant coffee granules. I'm not sure if it was a mistake or a "blessing in disguise". I naive-ly thought the the granules would break up into powder form when I blended the nuts/sugar mixture, but not they didn't! I was looking for a slight brown tint from the coffee, but it never quite appeared as the granules refused to be grounded fine. And since it WAS intended to be an experiment, i continued. In my urgency to finish baking quickly, I decided to warm the egg whites which were taking forever to reach room temp. And stupid me warm them too long in the microwave and I got half-boiled egg whites. twice. So I finally got the hang of warming them after wasting 70g of egg whites.

So, being lazy, again, I'm still with the french method. Although it did cross my mind to try the italian one again, but the thought of boiling the sugar syrup, plus, a dinner appointment later in the evening kinda just made me blow that idea. So, it's still french. I can safely say I got the hang of whipping just 35g of egg white in my kitchenAid mixer pretty well =))

Surprise surprise! While folding the nut/sugar mixture into the whites, the nice pale brown i was looking for sufaced! While there were still some granules not broken down, they actually became quite a pretty sight with speckles of brown scattered randomly in the "macaron batter".

Since I was on a coffee theme, I decided to do "opera macarons". So I made a coffee swiss meringue buttercream and chocolate ganache. I piped a ring of coffee buttercream and filled the hole with dark chocolate ganche.

I'm glad it all went well and the shells were more "sturdy" this time though I didn't try out on myself personally. I've actually been trying to make heart-shaped macarons but sad to say, my piping is a little irregular and I always can't find a match size! So, no pics and no filling for those heart-shaped ones =(

Nonetheless, I really like that I've ventured into flavouring the macarons and hmmm maybe I'll try....hazelnut shells next?

Tuesday, September 1, 2009

imitation apple pie

Nope no mistake in the title. Imitation apple pie. I read Rei's latest post on Apple cinammon muffins and that sounded so tempting I couldn't resist not baking it. Moreover, D was all for it cos he lovessss cinnamon.

I just tried one (yes, that's why I'm getting fat) and it tasted like Mac D's apple pie minus the crunchy pie and apple sauce. The combination was superb and I liked how it wasn't too sweet without an overpowering scent of cinnamon.

I decided to "kill two birds with one stone" and halved the recipe and turning the other half into orange cinnamon muffins. I haven't tried the orange cinammon ones as D has packed them for his colleagues tomorrow. I managed to try the apple ones as we had extra batter for it, which meant we had extra muffins.

I omitted the ground nutmeg as I didn't have any on hand. Other than that, the recipe's a keeper =) oh! I also didn't have enough raisins, but the muffins still came out great!

I have been very much inspired by flickr contact RATUkek with all her cupcake flags/picks and very very very lovely packaging that I decided to make some muffin picks. Well, they can be used to tell the flavours apart too right? I love how the picks worked out on the muffins..I'm lovin them! =pp

For apple cinnamon muffins recipe, click here.

Orange Cinnamon Muffins (makes 6 muffins that are 5.5cm in diameter)

Dry Ingredients:
150g Plain Flour
1/2 Tbsp Baking Powder
1 Tsp Ground Cinnamon
75g Brown Sugar
20g Raisins
Grated orange zest (from 1 medium orange)

Wet Ingredients:
63g Butter, melted and cooled
1 egg (~50g), lightly beaten
93g milk
1/2 tsp orange oil

For the topping:
30g Plain Flour
1 Tbsp Brown Sugar
1/4 Tsp Ground Cinnamon
15g cold Butter, cut into small pieces

Method:

1) To prepare the toppings, in a bowl, add all dry ingredients and rub in butter till it resembles breadcrumbs. Alternatively, you can use a fork to break up the butter for you. Chill in the fridge for later use.

2) Preheat oven to 170°C. In a bowl, add flour, baking powder, cinnamon powder, nutmeg powder and brown sugar. Use a whisk to whisk the dry ingredients together.

3) Throw in orange zest and raisins, mix well.

4) In a measuring cup, whisk milk, eggs, orange oil and melted butter together. Pour the wet ingredients to the dry ingredients. Stir with a whisk, spoon or fork till just combined. It is important that the ingredients are only just combined. Do not overmix.

5) Spoon the mixture into muffin paper cups till about 2/3 full. Top with some streusels prepared earlier. Bake for 15 to 20 mins or till golden brown and when tooth pick inserted comes out with few loose crumbs. (mine took around 18-19 min)

Recipe adapted from Rei

sweets for the very sweet-toothed

Anna's recent write-up on her macaron making journey made me think of mine. Like her, I went through many many macaron making attempts in search that perfect macaron. A macaron with 'feet', slight crispy shells with moist, slightly chewy interior and dry and smooth bottoms.

I must say I have quite a little 'luck' making macarons as my very first attempt already had feet! Well, sad to say the oven temperature was too high and they brown SO quickly, they almost got burnt so I was left with no choice but to pull them out. As a result, the bottoms weren't dry enough and they left their sticky bellies on the parchement.

A quick check at my macaron picture folder did I realise it was almost a year ago when I first attempted to make these temperamental, fussy little sweets. I very much believe I went through almost all the various problems anyone who attempted making macarons would have came across. Cracked tops, fat feet, no feet, sticky bellies, air pockets, you name it, I did it.

I have since tried the italian meringue and french meringue method which oddly, I very much prefer the french meringue method! For some very very odd reasons, italian meringue-made macarons left me with either with no feet or very small feet. No only that, the shells were a tad chewy and SUPERLY sweet. Not to mention a HUGE mess to clean up with the sticky sugarly pot and tons of perspiration =X

However, the french meringue method seems the most vulnerable and most often leaves me with air pockets. But, i guess that could be solved when it's filled with filling isn't it?

I'm pretty satisfied with today's attempt after a horrible, demoralising one last night. Though not perfect, but I think it's one of the best to-date. The shells were a teeny weeny bit too soft in my opinion (which i think will further soften with the filling filled) but i liked how the interior was soft and so very slightly chewy. I had quite a bit of leftover cookies and cream filling so I decided to fill them all with that. It was a pretty good combination i must say IF you like cookies and cream.


Although I did leave the macarons out to dry, they didn't really form a "skin". I didn't really bother and just chucked them into the oven and boy was I glad that the feet bubbled away and no cracks! The feet was a little high in my opinion, which might be because I underfolded it by just a few strokes, i think.
Other than the pretty feet and nice dry, smooth bottoms, it's my first successful attempt at making coloured macarons! So, I'm pretty satisfied despite the shells that are a tad too soft. Probably bake them longer..? I don't know!
I know I kinda promised a friend some macarons a LONG time ago. So, here they are, all packed and awaiting collection. =D
Related Posts with Thumbnails