I didn't realise that it has been almost a
month since I last posted something. Finally done with my exams!! and am now officially
unemployed. sigh~
Well, on a happier note, I'm back to my baking regime again! I have been checking back regularly and have been baking during the past month. Was pretty busy with preparing for the exams towards the end so I totally ceased baking. My brother saw me mixing and measuring in the kitchen this afternoon and he said "
eh? you like very long nv bake le hor?" well, yes my dear, i'm glad you realised. =p
I have been baking then and now but was just too tired and couldn't really be bothered to take pictures and blog about them. they were more like..erm..a break from studying for me. of course, i did attempt some new stuff and re-visited some old recipes and now, i have a huge pile of recipes waiting for me to try them out!
I seriously had no idea where to start, so I decided to
go easy. Isn't it pretty obvious that cookies would be the number one choice? hehe. no complicated mixing, no fretting over super accurate oven temperatures and of course, a breeze to make. and fast too. needless to say, easy to photograph as well. no need to fret over the slices, the whole look, etc. most importantly, they're so yummy and addictive!

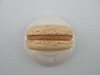
I got this recipe via Anna's freebies (by subscribing to her mailing list). She has her story and how she arrived at naming these cute little peanut butter cookies -
peanut butter blessings. Well, I have my own too! I brought some freshly baked ones for my brother to try without telling him what were those and got him to guess. he went, "
is it one of those cny cookies again?" I went ?! aren't they obviously peanut butter cookies? and it suddenly struck me after tasting a second one, gosh! they're almost identical to those peanut cookies you'd probably have during cny! Tries to modify the cny almond cookies recipe to the peanut version, didn't taste as nice and addictive as the almond ones. and so...this means, i've found my cny peanut cookies replacement!!

That aside, this recipe is really really easy. you don't need a mixer. just a whisk or a wooden spoon and 1 mixing bowl. you're good to go. i got every mixed in less than 10 minutes. quick. fuss free. and yummy =)
I'm not sure if i'm able to share the recipe out here as she changes her freebies link from time to time and subscirbers get updated ones via her newletters. So if you really wanna get your hands on her various free recipes, just hop on
here to join her mailing list. it's free anyway!

I orignally intended to try out
three cookie recipes. All thanks to my laziness and procrastination, I only managed two! The other is none other than these super
chocolatey double chocolate chip almond cookies! I got this recipe from Elyn which, is another really easy recipe to make =) Although the recipe required creaming the butter and sugar, I was again, too lazy to bring out the mixer. So...yes you guessed it, I used a whisk to put everything together. It's pretty easy to cream the butter/sugar mixture with a manual whisk provided your butter is soft enough and of course, the amount not too much lah. I found this pretty manageable for this recipe and managed to get it light and fluffy without breaking my arms =p
 Elyn doesn't mention how big or how much each cookie should be, so I just guessed and used my own measurements. Her recipe state that it yields about 42 cookies, but i managed about 48. *shrugs* nonetheless, the cookies were crispy, crunchy and chocolateyyy!
 Here's the recipe with some of my modifications.
Double chocolate chip almond cookies
Ingredients:
100g butter
45g sugar
45g brown sugar
20g egg (about half an egg)
140g plain flour
20g cocoa powder
1/4 tsp baking soda
60g chocolate chip
30g diced almond
Method:
1.Line baking tray with parchment or baking paper. Preheat oven to 170C.
2.Cream butter and sugar till light and fluffy. Add in egg a little at a time until well mixed.
3.Fold in sifted flour, cocoa powder and baking soda till just combined.
4.Mix in chocolate chips and diced almonds.
5.Measure out leveled 1/2 tablespoonfuls of dough, roll them into a ball and place on baking tray. Use a fork and flatten the cookies.
6. Bake for 13-15 min.
Makes approx. 48 pieces.
Note :- The cookie does not flatten or spread out during baking.
adapted from Elyn
~happy baking!~

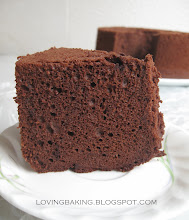
 I finally tried out the much raved steamed moist chocolate cake recipe. It was super easy to put together and of course, a healthier alternative. Or so i think it is =p
 The only problem I had was that the cake was pretty short. Less than 2" tall, 1.8" to be exact. (yes, i measured it) =( Plus, I had many small little holes on the surface of the cake AND the center was taller in the middle than the side! I did cover it with foil. But I'm not sure if it is considered covered "loosely". What I did was just to place the foil over the cake tin. No wrapping no anything. Just to make sure the surface was covered.


.jpg)