Friday, October 15, 2010

Chocolate crunchy mousse


I've been away for a while, but I haven't been idling! I have a few bakes that has been sitting in a folder on my desktop for a while now. If I wasn't going to post them any sooner, it may have been never. 

I wonder how many of you ever had a slice of the Guanaja, a chocolate cake from Rive Gauche. I had mine first at a friend's birthday dinner and fell in love with it ever since. That bittersweet chocolate accompanied with the slightly sweet and crunchy biscuit base was to-die-for. It had almost been forever that I tried to get the praline biscuit bottom right and I never truly succeeded. The next time I had a chance to sink my teeth into these delectable slices was during my younger sister's birthday back in April when I decided it was the best excuse chance to get this as a birthday cake for her. Everyone raved about the cake and as for me, I sat near the cake, chomping down as many as I could, hoping no one had really noticed.

The next few months were pure torture whenever I thought of and craved for this cake and finally my wish came true when my cousin bought that same cake for his sister's birthday in July. 

The attraction of this cake continued to mystify me despite the various attempts are trying out to formulate its composition. Finally! The opportunity emerged when I had much success with the Japanese dark pearl. I realised that the Japanese dark pearl was able to stay nice and moist despite being in the fridge which meant it could be the perfect sponge base for the cake I was dreaming of. Needless to say, the dark intensifying chocolate taste in the cake itself meant that I need not worry about bland chocolate flavours in the mousse.

I had, on many occasions, tried searching for a good praline feuilettine base to to no avail. I read that people replace feuilettine with cornflakes and I've tried and failed. The cornflakes were too hard to bite into and the corn taste was just too overpowering. I knew that if I didn't try it soon, it'll never happen. So, I went ahead, searched for various recipes and mixed and match, altered this and that. 


TA-DA! Here it is! My very own version of "Guanaja" which I call, "chocolate crunchy mousse". Now, I've got the taste right, but the presentation failed. The ganache topping cracked real badly over a night in the fridge. I have desperately tried searching for an answer but have found nothing really helpful. All I could speculate now is the temperature of the cake, ganache and fridge. The only logical explanation I have is that, the cake shrunk whilst in the fridge which caused the semi-set ganache to be "torn apart" during the contraction.

Does anyone out there meet with similar problems? Hopefully someone could point me to the right direction =)

Till then...

Tuesday, August 24, 2010

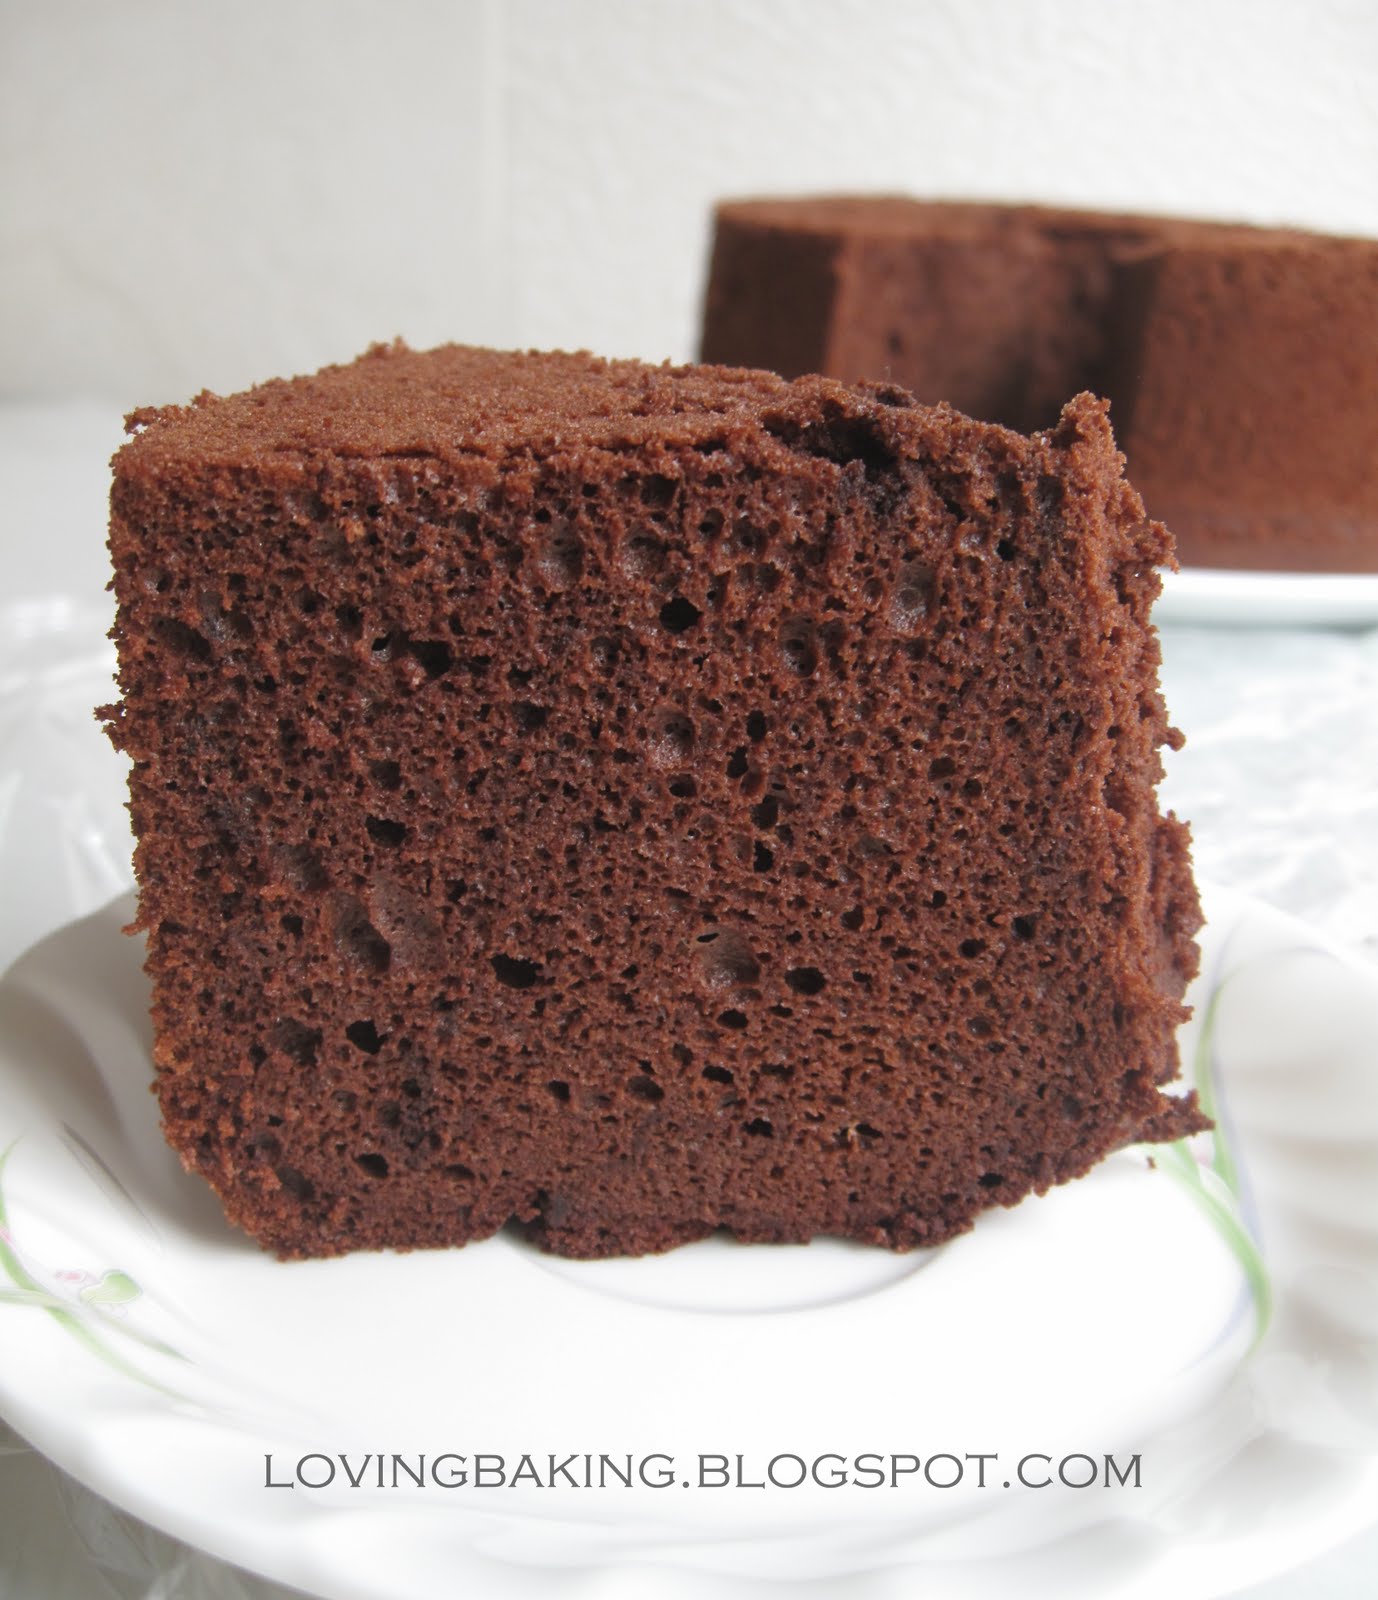
Japanese Dark Pearl Cake


For some unknown reason, baking with chocolate always seems like a whole new science to me. Sometimes the recipe works, sometimes it doesn't. And as such, recipes with melted chocolate always leave me procrastinating, longer than usual. 

This Japanese Dark Pearl cake is no exception. I recalled being soooo intrigued by Bee Bee's post, that I jumped right at trying it out. Baking chiffons has always been a challenge to me, and I dare say, many other home bakers as well. Heard of those horror stories of cake collapsing, shrinking, fell like a bomb from the chiffon tin, I've been there, done that. Having had much success with an orange chiffon, then a pandan chiffon, I wondered if I could move on to the chocolate chiffon. 

Well I thought with a scoff, that's simple, just substitute part of the flour with cocoa powder. Ain't that easy? No. Not until I saw aunty yochana's post of this mysterious Japanese Dark Pearl Cake via HoneyBeeSweets.
I saw the texture and colour of Bee Bee's cake and it was simply screaming "chocolate overload!!!". How else would you get such deep, intense chocolate flavour with just cocoa powder in a chiffon?! Duh, melted dark chocolate!

I jumped right at the chance to try it out, it was the moment recipe I was waiting for. Then I read the comments at aunty yochana's and saw a number of "failures" and the debate about whether there was enough flour. I left a comment at Bee Bee's and her success was an assurance to me, so ahead, I went. I can't remember exactly what was I trying to bake or assemble, but I recalled being totally defeated while mixing the batter. The flour was soooo little, the chocolate relatively more and the egg yolk/cocoa batter was so thick and gooey, my arms ached while mixing them together. Even my whisk threated to fall apart because of its sticky pressure.  For some very odd reason, I can't recall what happened after that. I couldn't even remember if the batter made it into the oven, and if it did, did it even made its way to our tummies. I could only conclude that the failure was so disastrous that my memory had even refused to recall that sad episode.

 
I chanced upon this Dark Pearl Cake back right where I first saw it last night and was determined to make it right this time. I must say that the bad experience hit so hard, I had trouble sleeping. Wondering if it would be a success and wondering if I would be wasting a good 150g of Valrhona chocoalte. -_-'''

By the time I gathered enough courage to go ahead with this once-failed-cake , I had to realised that:

1. my cream of tartar expired. Just great
2. I had ZERO baking soda. even better

I was stunned and literally stared at the bowl of melted chocolate. I thought "It's might not work anyway, just do it. And if it works, all the more better isn't it?" . How naive isn't it? Read on..

Since the failure of the last attempt, I decided the batter had to be much much lighter for it to have a slight chance of succeeding. So I decided to whip the egg yolks till ribbon stage and fold in the rest of the ingredients of the "cocoa batter". Things started to look a little optimistic when I saw a familiar "egg yolk batter" density. Being afraid that it would deflate fast, I rushed to wash the mixer attachment and went on at lightning speed with the whites. uh-oh. Mistake. No cream of tartar remember? 

I almost freaked out when I saw the once familiar lumps of egg whites, turning from a cloud of white to a puddle of almost deflated foam. Yikes. I stopped immediately and knew it was over-beaten. It's either gonna rise super high and collapse like the twin towers or it's not gonna rise at all. But I can't afford to dump all of it into the bin now! What a waste it'd be. So I went ahead with it, folded it in with much difficulty because overbeaten whites are so lumpy they are hard to incorporate without trying to break them up with more force. I ended up with a more watery batter than the usual chiffon batter, said my prayers and off in the oven it went. 

Surprise surprise! It rose, and almost to the brim in fact! But, the battle ain't over until the cake is out and cooled. And so I waited, and waited. The cake came out, though badly cracked, I couldn't care less. Not in comparison if it would survive the cooling. overturned. 

The cake shrank, no doubt, but not terribly or badly, just the way some chiffons shrink upon cooling. and yay! It hung on until it was time to unmould and my my, look at that tender crumb.Boy! was I glad I did not give up. As adventurous as it may sound, I start to wonder if it would have overflowed if I had baking soda and if the whites to beaten to perfection..hmmm

Nonetheless, the recipe proves to be a bake-able one. 

Looks can be deceiving so the ultimate test still lies in the taste buds. And this sure is a winner. Though, I must say it's quite unlike most chiffons. It's not as light, it carries a certain body to the cake but definitely very very flavourful with a deep, dark intense chocolate sensation. Contrary to belief, the chocolate in the cake did not make the texture dry. In fact, the cake is so moist, I could literally hear the "whoosh" as my fork went through the cake as I ate. 

And of course, don't take my words for real. Try it yourself and be convinced! 

Japanese Dark Pearl Cake

Cocoa Batter:

150 gm. Chocolate - chopped (I used 70% Valrhona Chocolate)
90 ml. water
100 gm. corn oil ( I used sunflower oil)
25 gm. cocoa powder (I used Valrhona Cocoa powder)
65 gm. cake flour
1/2 tsp. bicarbonate of soda (substituted it with double action baking powder)
115 gm. egg yolks (I used 6 egg yolks)


Egg White Batter:


225 gm. egg white (~257g egg whites which is approximately 7 egg whites)
100 gm. castor sugar (I used raw sugar)
a pinch of salt (forgot to add it)
1/8 tsp. of cream of tartar (omitted it)


Method:
(1) Melt chocolate and stir till smooth. Add in cornoil slowly, stirring all the time till smooth. Fold in the rest of the ingredients and stir till smooth.   Whisk the egg yolks with ~30g of sugar (from the 100g) until pale and fluffy (ribbon stage). Whisk the flour, cocoa powder and baking powder together and mix together with the chocolate-oil mixture. Fold the beaten yolks slowly into the mixture, taking care not to deflate the mixture.

(2) Whisk egg white with cream of tartar till frothy, then pour in sugar gradually and then add in the salt. whiks till a soft peak is formed.
(3) Fold egg white into the egg yolk mixture and then pour into a 23" to 25 "  21" round chiffon cake pan.

(4) Bake at 175C  170C for about 45  40mins. or till cooked. till skewer inserted emerges with loose crumbs attached.

(5) Invert cake onto a cooling rack until completely cooled. Remove cake from pan and serve.

*Changes I made are in Italics.

Wednesday, August 18, 2010

An apple tart with some appreciation

I written and re-written the start of this post, yet I still couldn't find the best way to start. It feels like I've lost my writing and communicating skills after retreating into the moutains and living in the caves for too long a time.

Anyhow, I got inspired to bake with apples by bakertan who very kindly shared a little knowledge on the various apple types. As stupid as it sounds, I've never really baked with apples before. And even if I did, they were playing much of the supporting role or just being a fill'in when I was lazy to prepare something more elaborate. Well, a perfect example would be when I first started out trying to make my own puff pastry. The easiest filling I could think of and whip up in a jiffy would be, chopped apples with some butter, sugar and cinnammon. What's more, my helper did it all. I just took the credit of that glorious moment when the freshly bubbling hot apple turnovers came out of the oven. Ashamed I was not, but now, yea, well, a little.

As if that wasn't enough, I soon found my really close friend, someone who journeyed her junior college and university life with me, asking me to bake apple pies. I always told her with a mark of confidence that it would be as easy as a pie (pun not intended). While the truth was, I never really did bake a proper one, ever.

For some odd reason, pursuing the basics and fundamentals was not in my book of interests and it wasn't till bakertan's post that jolted me to my senses. The way he described his knowledge on the different apple types made me really curious about apple baking, I mean, baking with apples.

So, the word "golden delicious" was somehow stucked with me pretty much the whole day. Just that fateful day, I happened to be at Carrefour and decided to look out for these "infamous Golden Delicious apples". Lo and behold, there were right in front of me, sparkling in their pretty packaging. I hesitated, thinking, if I would ever cave into procrastination and end up having to toss these apples into the bin. Alas, the greedy me won over the battle of the apples and I grabbed, not one, but TWO packets and marched to the cashier.

And so, as if I could read my own future, the procrastination queen reigned and the apples laid in the fridge, untouched, for 2 days. Finally, I decided that the apples wouldn't and couldn't wait any longer for Her majesty so I decided it's time I got some apples going baking. While in between the procrastination, I gained much encouragement and regained my determination from everyone who left comments on my previous post. I'd like to take the chance to say a BIG THANK YOU to all have been ever so supportive and encouraging! =D 
I had been reading up a little. As a I stared at the bookshelf of baking books, I can't help but notice one of the heaviest and thickest ones, Baking from my home to yours by Dorie Greenspan. Several pages later, I decided that there were TOO many apple tart recipes in the book to choose from. So, being the lazy me, I chose one with: 1. The simplest ingredients needed, 2. all the ingredients I already had.

And of course, one that specified for the use for my oh-so-precious "Golden Delicious". I had only made one tart prior to this apple tart, which was the chocolate tart. So my tart-experience isn't that much and I vaguely recalled a mini frenzy then.

As simple as the recipe had stated its steps and so it was, minus the estimation I had to make as I baked mine in a smaller tart pan. If there was anything I would warn anyone about tart-making, it would be TIME.

Though armed with simple ingredients, simple steps but it sure took a LONG time to bake, and cool, and bake again. But that of course, are the ramblings of a not-so-freuqent tart baker. Don't get me wrong, the recipe was a crazily simple one. I didn't even have to cook the apples in butter,sugar and cinammon. Yet, the end results was a tart that was Mmmm, yummy. 

All I had to do was slice the apples, arrange them prettily, prepare the custard and pour it over. And...there you have it! As unappetizing as it may seem, the taste was simple, yet delicious. Something rich, yet not overpowering. Perfect for a lazy afternoon, with a steaming cup of tea. The tart had cooled completely by the time I could "stomach" it so I re-heated the slice in the microwave and my! it was bursting with flavour! And the thing which amazed me the most - the apples retained their crunch! It was soft yet textured, sweet yet with a slight tang which complimented the sweet custard so well. YUMS!


Verdict: The "Golden Delicious Apples" certainly lived up to its name. Delicious it is!

I don't think I'm at liberty to share the recipe, but if you're interested, and if you have the book, refer to page 314 "Alsatian Apple Tart".

Monday, August 16, 2010

Surprise! ...not

 
I promised in my previous post that I'll be back soon and I'm trying hard at keeping my promise! 

I've been back blog hopping these days and I must say, as usual, as with almost all food bloggers, there's simple TOO many recipes to try out. 

It was not until I saw Happyhomebaking's post that compelled me to try it out almost immediately! It was really heart-warming to see how she grabs every opportunity available to show her love, care and concern for her dear husband whom is working hard for the family overseas. Yet, it also jolted that guilt in me and reminded me to shower a little care for my darling D. 

Part of my long absence from baking and blogging stemmed from me starting work coupled with my lousy stamina and well, some unhappiness having to do something which I didn't exactly enjoy. It was only then I realised how pampered I was, when D would take time out almost every evening to pay me a visit and slog through the night baking and washing up for me. 

Amongst the many other commitments he's got, every other spare time he had, he spent it with me. I not only not show my appreciation but still, I complained at times. 

HHB's gesture dug out that guilty conscience in me and I thought what better way to start with something, simple, easy and tasty. Another guilty chord struck when HHB's post was on Oatmeal Cookies. If there was any favorite cookies D loved, it's be Oatmeal Raisin cookies. It's a shame that after all these years baking and doing all that fancy stuff, I neglected the simplest of all. 

Wouldn't then it be perfect to give a shot at an Oatmeal cookie recipe and make that a simple surprise? No. D surprised me instead when he sneaked into the kitchen just when I was scooping the balls of dough. Nonethless, when D peered over to see what was I up to, he broke into a HUGE grin as he recognised the rough looking textured heaps of dough on the baking tray and said "Oatmeal raisin cookies! My FAVORITE!!

When the cookies cooled off, he popped one into his mouth. After 2 of them, he went "I think I can finish off the whole tray soon.

Now, do you consider that a successful surprise?

The cookie yielded quite a special texture. Not quite crispy, yet not quite chewy either. But it tasted great nonethless, with the fragrant buttery aroma, coupled with healthy rolled oats, some chocolate chip, raisin and walnuts, a great tea-time, any-time snack in fact!

Here you go!


Chocolate Chip Raisin Walnut Oatmeal Cookies

Ingredients:
(makes about 32 cookies)

90g butter, softened at room temperature
25g raw sugar
25g brown sugar
1 egg (weights about 60g with shell), lightly beaten
1 teaspoon pure vanilla extract
1/4 teaspoon salt
100g cake flour (or plain flour)
100g rolled oats
50g walnuts, coarsely chopped
35g raisins
75g chocolate chips


Method:
  1. Preheat oven to 190degC. Line baking trays with parchment paper.
  2. With manual whisk, cream butter and sugar in a mixing bowl until the mixture turns pale and fluffy (alternatively use an electric mixer if desired).
  3. Dribble in the egg gradually. Mix well after each addition. Add in salt and vanilla extract, mix to incorporate into the batter.
  4. Sift the flour over the batter, fold in with a spatula.
  5. Add rolled oats, walnuts and dried cranberries. Mix well with the spatula.
  6. Drop heaped teaspoonfuls of the cookie dough onto the prepared baking tray. Leave some space between the cookies to allow for spreading (actually, they don't spread too much). Flatten each cookie dough slightly with the back of a fork, keeping the shape as even as possible.
  7. Bake for 8~10 mins or until golden (my oven took 12~15mins). If necessary, rotate the baking tray halfway through the cooking time to ensure even browning. Transfer to a wire rack to cool completely. Store in air-tight containers.

    Recipe source: adapted from 好想为你亲手做出美味的甜点! 检见崎聡美
adapted from HHB with modifications in italics.

Enjoy!

Monday, August 9, 2010

I'm WOW-ed!

Before you think I'm back with more recipes, energised and ready to blog blog blog, well, you're not entirely wrong, but not quite right either. 

I'm WOW-ed and left speechless when I actually made it to attend the food blogger's party that Pei-Lin organised. It was almost like a dream come true, getting to meet this virtual friend whom I've know over the past 2 years. It felt almost unreal when Pei-Lin dropped an email sometime back asking for a meet-up. 

Well, I'm terribly guilty for my inactivity as I listened to the other bloggers chatting away. And I thought to myself, gosh! I've been away for SO long, I seriously have little idea of who and what they were referring to. But that enthusiasm and that same passion for baking, blogging, writing and taking pictures blew me away! I felt ashamed at some point in time for not being able to keep up with my blog which I started out with much passion and drive for. 

When I got home, I immediately started checking each and everyone's blog, to put a face to the blog and I must say, that knowing the face behind the blog skins makes reading that someone's blog feel so different. It's as if you've upped one level. 

Though I have no pictures to boast of, nor goodies I made to contribute my portion, I was blown away by each and everyone's warm and friendliness. Though it was just then that we met, but we chatted with so much in common. 

It was REALLY pleasant meeting everyone there and I'm SO glad I managed to make it there in time to enjoy the company. 

For more pictures, blogposts and a glimpse of who made it there, hop on over to:
 I'm WOW-ed! That I CAN'T wait to write this post! 

A big thanks to everyone whom I met that made this meet-up so lovely!

I'll be back...
  

Sunday, April 18, 2010

Since I've been gone...

..not for the first time. Please pardon my long absence. Activities just got more and I just simply didn't have the time, energy and mood for taking and editing photos, much less updating the blog.

I very much wish I had the time and enthusiasm I once had in updating this blog. Don't get me wrong! It doesn't mean I'm gonna lock this blog away in the safe forever but the updates will just come at a much slower rate. As the lack of time has affected my blog updates, so has it affected my baking schedule. Much as I wish to be baking away like a mad woman and updating this blog with tons of pictures and recipes, that's gotta wait.

On a happier note, let me catch up on what I've missed for the period of time I've been gone..
First of all, a big thank you to everyone who came to NUS to support Sweet Couture. My siblings, D and I had a fantastic time selling our goodies to you people and we hope you enjoyed eating them as much as we enjoyed selling them =D Of everything I made, I loved the macaron the most. Experimenting with earl grey and chocolate macarons was somehow quite a breakthrough for me. And, I'm glad it worked out perfect.
Being a chocoholic myself, I couldn't resist putting The Chocoholic cupcake on the menu and it was just as well-received. Needless to say, the cookies were the first ones to be sold out and it was nice knowing that people actually came back the following day to buy MORE! =)


While I thought I needed a break from baking madness, I cam across pictures of cupcake bouquets by chance. They looked SO captivating and I told myself I HAD to make one. Wouldn't it a perfect gift for mother's day? How sweet isn't it?

I caught the flower cupcake making bug that I decided to open a "class" for my friends and invited them over for a session of cupcake flower making!


Check out the variety of flowers we made during our baking session. I love making cupcake bouquets! They're simple to make and to top it up, simple to eat as well! No fuss over having to cut up the cake!! =p

If you havent got an idea what to get for your mother for this Mothers' Day, why make a cupcake bouquet and impress her with edible flowers?

I had meant to post these pictures up a long time back but I got lazy and tired and the pictures were just stored away in my laptop, waiting to be uploaded. Now that I am back from a really GREAT break/holiday, I thought to myself that I shouldn't procrastinate further.

At the boarding gates at the Singpore Budget Terminal. Just before we left for sunny Phuket!

D and I and a bunch of friends took the weekend off and had a really GRRREAT time in sunny Phuket! It was a nice break from work and all other things and now I'm pretty much recharged to be back baking and taking photos and uploading them, I hope. The fantastic shots my friend took with his DSLR captured really nice memories of the trip.

So, I shall let the photos do most of the talking.


Beach fun @ Patong Beach!

 
Street Food

What's visiting Phuket, Thailand without having a taste at their street food. Superb grilled chicken, with just the right doneness. YUMS!


Singha

Not forgetting a taste of their local produced, Singha Beer. I'm not a fan of alcohol nor do I even don't mind drinking. But Singha beer has sucessfully made it to my list of permitted alcohol beverages. =D

 
Preparing ourselves for snorkelling!


Lush Sea Anaemone


Sunset @ Bangla Street. One of the most happening streets in Phuket.


Fried rice.


Mixed Vegetables sauteed with garlic

The fried rice and mixed vegetables were something familiar, but the great company and a day of fun at the beach made the food seemed especially nice! =)

Clear tom yum soup.

Having tried Thai food in Singapore, I dare say that the Thai food standards in Singapore is as close as it could get as the authentic ones in Phuket.


The SUPERB fish

The fish was REALLY good. Nicely done with fantastic-tasting sauce. They even separate the meat out so that you don't even have to remove the bones! One of the advantages of having a friend who's a chef travelling with you is that he can ensure the freshness of the seafood. Especially so when you get to choose your own seafood in Phuket!

 
Fresh seafood


Beakfast @ Bodega

Museli @ Bodega

In case you were wondering, Bodega is the place we stayed in during our time in Phuket. An extremely affordable place with SUPER friendly staff. A very very nice place. Plus, it's close to the beach!


Eve of Songkran

To end of the wonderful trip, we managed to catch a glimpse of the Thai New Year, Songkran just before we left. And yes, we got drenched while walking along Bangla Street and went home in the plane with wet clothes!

If' you've persisted reading to the end of this post, I applaud you and thank you for reading this long long post. As with every blogger's wish, I hope to be back more regularly, posting more bakes and recipes!

Friday, March 19, 2010

Bake Sale!!!!


I believe the poster is pretty self-explanatory. Apologies for the last minute notice!

If you'd like to try out the goodies I bake, come on down to The Forum @ NUS on the 22nd or 23rd March 2010.

Sweet Couture Fans are entitled to a 10% discount so Be a Fan today! =D

See you there!!

Related Posts with Thumbnails